The Gluten Bigot: Meal Ideas
Showing posts with label Meal Ideas. Show all posts

Tuesday, January 21, 2014

Make it Once, Eat It Lots - Gluten Free Beef Stew

If you have been following my blog, or have seen my last post at least, you'll know that I'm expecting. Not only expecting, but soon to be meeting Bricklet. Of course when you have a baby there are all sorts of things to do to prepare... buy baby equipment, clothes, diapering supplies, etc. Many moms-to-be also take the time to make freezer meals. Of course being a gluten bigot planner, I had to be amongst them.

Now, I live in Manhattan - the most convenient city in the world. If I don't feel like cooking, I just need to order a delivery. And gluten free deliver is not hard to find here. However, eating out or delivery gets old (and it not ideal for getting that pre-baby body back). So I decided to make some of my favorite things.

The first thing I made is an old staple - beef stew. I basically always have this in my freezer and have consistently for the past 3 years. It freezes really well and cooks in less than 10 minutes from frozen on the stove top.

You'll need

  • Stewing beef / beef chuck 
  • GF beef broth
  • Garlic 
  • Whatever vegetables you like in stew (for me, onion, potatoes, carrot, peppers and celery).
  • Whatever spices you like, I usually do a couple bay leaf, salt, pepper, parsley, and some onion powder.
  • OPTIONAL: GF beer (alcohol evaporates when cooking so it fine for pregnancy and breastfeeding). I like to use Green's.
Browning Beef
Start by cooking/caramelizing the onions and garlic, then add the beef and spices and brown the meat (don’t cook it all the way through). If using, add about 1 cup of beer, alternate add about 1 cup of beef broth. Let that cook on a medium low heat for 20 minutes or so.
If including potatoes, they go in next along with about half of the beef broth and let cook for another 30 minutes. Then add remaining vegetables and cook for another 30 minutes or so. 
Remember to taste the broth and season to your preferences. 
What’s your favorite heat and eat GF dish?

Thursday, July 11, 2013

Homemade Gluten Free Meatballs

Sometimes you just need comfort food. You survey the contents of your fridge for what you can eat or make. This exact event lead me to meatballs. 

So easy, so delicious and so diverse. You'll need:
  • 1 lbs-ish ground beef. I used extralean.
  • Half an onion chopped as finely as your tears can stand.
  • 1/4 cup-ish GF Breadcrumbs. I used Kinnickinnick
  • 1 egg
  • 2 tsp chopped garlic or 2 cloves garlic.
  • Parsley to taste
  • Salt & Pepper to taste
Pre-heat oven to 400F. As mentioned, chop onion as finely as you can. My eyes watered a lot so mine was not that fine but certainly did the job. Put everything into a bowl and mix really well. No special order. Dump. Mix. Now get a cookie sheet or flat pan of some sort. You have two choices:
  1. Scoop a heaping tablespoon. Roll in hands. Put on cookie sheet. Or...
  2. If you are squeamish like me and the thought of handling raw meat make you feel ill, use your cookie dough scooper! See where I professed my love here -  honestly best $13 ever spent.
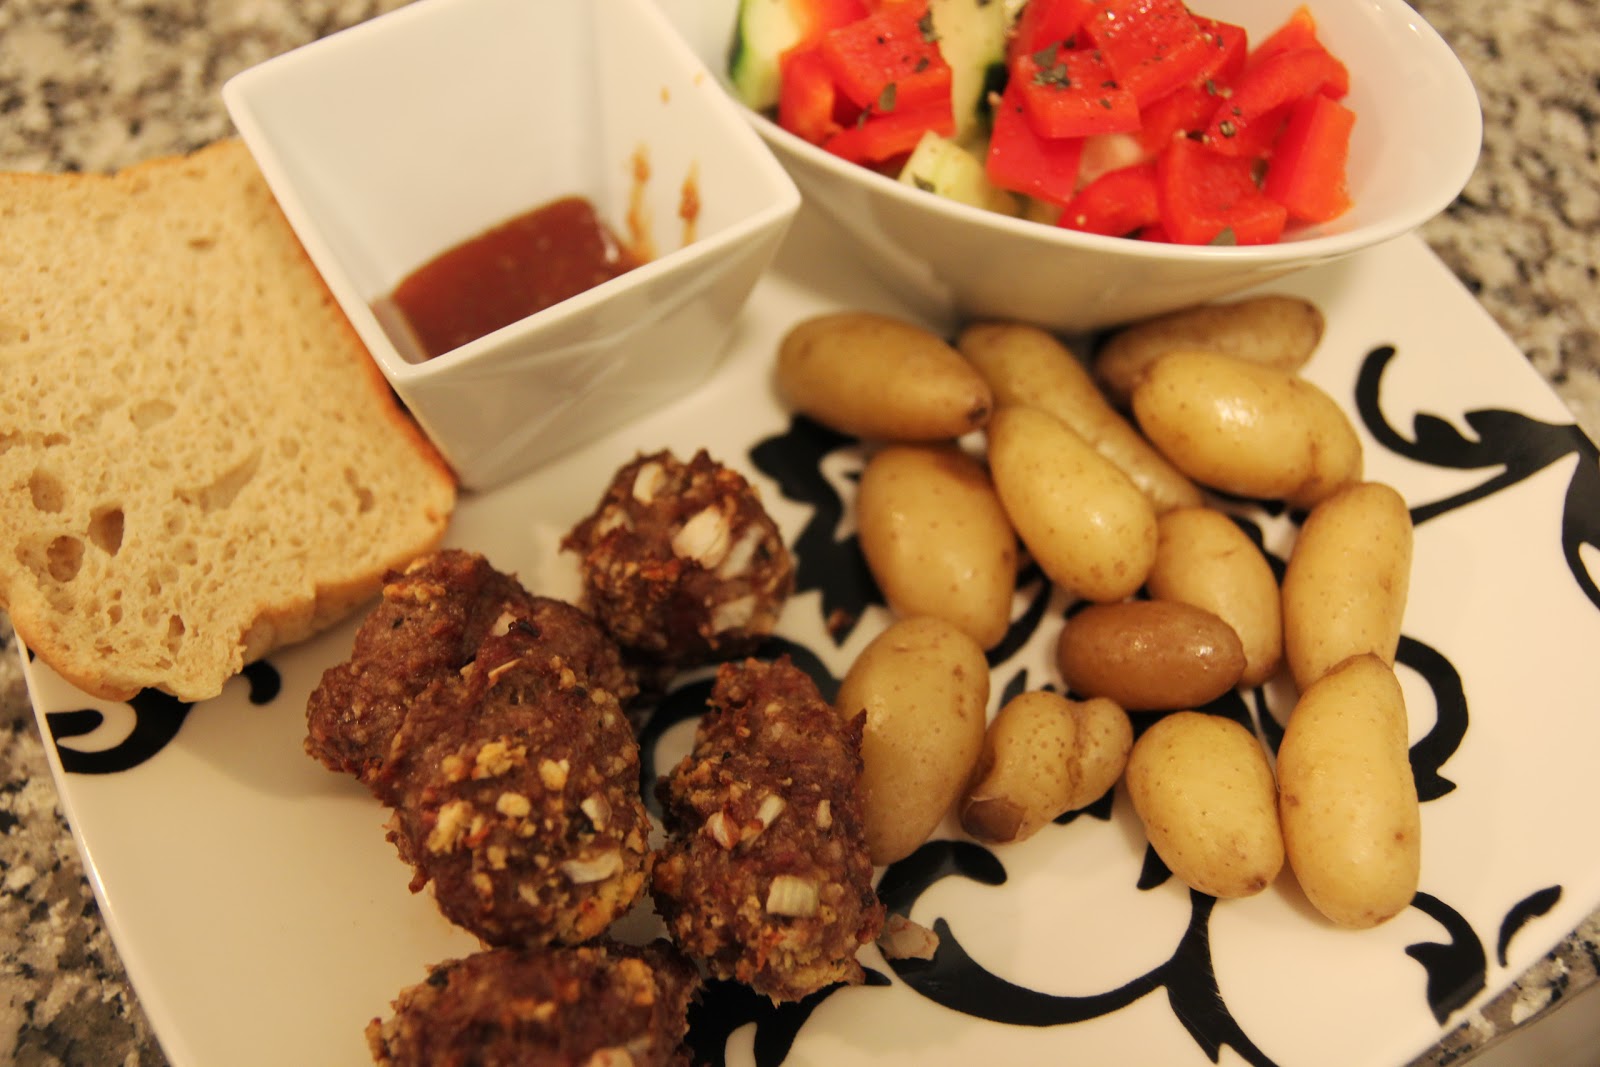
Once you have that all put in oven and bake for 20-25 minutes, or until cooked all the way though. Serve as a main or appie with some sauce (I made a honey garlic sauce from scratch like a boss), in sauce with spaghetti. Really, however you want.


Tuesday, July 2, 2013

Easy Dinner - Parmesan Risotto with Meat Sauce

If you have been reading my blog for a while, you'll know that I love meals that are 1. easy to make and 2. make multiple servings, hence reducing my overall need cook. This makes risotto one of my favorites.

Using this recipe as a template for the risotto, I used:
  • 2 tbsp extra virgin olive oil
  • 1 cup rice (whatever was in my cupboard, it was some fancy one that even noted it was ideal for risotto ftw).
  • 1 quart low sodium organic chicken stock
  • Dash of Pink HImalayan Sea Salt
  • 1/4 cup Parmesan Cheese
Heat oil over high heat in a large pot, then add rice. Fry for a moment, then add chicken stock and salt. Bring to a boil, reduce heat and simmer. Once almost all the stock has absorbed, add parmesan cheese. Mix and complete cooking. 

The sauce was easy. I already had some homemade tomato sauce in my fridge. I also cooked a chicken breast and shredded it. As a side note this was the first time I have ever shredded meat myself and thought it was good fun. I heated up the sauce, added the shredded chicken and simmered about 10 minutes.

Top the risotto with the sauce. Serve with a salad for a nice serving of vegetables. I also had toasted bread as I absolutely love having bread with my risotto. 

What is your favorite kind of risotto?


Tuesday, June 25, 2013

Spicy Garlicy Cauliflower Goodness

A few months ago my husband brought me to Buddahkan, where I enjoyed a really nice cauliflower dish which they cooked for me with oil and chili flakes. It was spicy and divine. I swore I would dupe it at home, but alas, I was a bit lazy. In need of easy lunches to grab and eat for work (which are also good for me), I finally went for it and make it on my own.


It's so easy to make. I started with a 1.5-2 tablespoons of extra virgin olive and threw in about a teaspoon of chili flakes. I let it sit for a few hours so the oil would absorb some of the spiciness from the get go. Ideally this would sit out overnight, however the six or so hours I left it did the trick.


When it was time to cook it I chopped up an entire head of cauliflower (they call it a head right?). Then in a large frying pan (a wok would do nicely here as well), I put in the chili marinated oil with the chilis and a couple teaspoons of chopped garlic (2 garlic cloves press would do nicely). I heated the over a high heat oil with the garlic and chili so it would absorb the favor. Before the garlic burned, I added in all the cauliflower and stirfried it for about 10 minutes until the cauliflower was nice and cooked. 

The results were delicious! It made about 4-5 servings. Super easy to grab, has a good fat in it. What's not to love. 

Friday, June 21, 2013

Roasted Potatoes & Stretchy Pants (AKA- the Greek Feast)

The last touch for a big ol' Greek feast is roasted potatoes. Greek roasted potatoes are probably one of my favorite versions of potatoes. To make mine, I used:

  • 3 yukon gold potatoes
  • 1/4 cup extra virgin olive oil
  • juice from 2 lemons
  • 1 tsp chopped garlic
  • a bit of salt and pepper.
With my oven at 425-450 (I was cooking the chicken souvlaki and pita at the same time), i put all the liquid and spice type things into my la creuset casserole dish and mixed, then added cleaned and chopped potatoes. I won't tell you how you should chop your potatoes. Long quarters, chubby quarters, halvies, you're wild girl and you do what you want! Just make sure you put them into that dish (or pan) and roast for about 40 minutes. I flipped mine once half way through.

Serve with the rest of your Greek fixin's including tzatziki and greek salad. Ideally whilst wearing stretchy pants.

Oh and be ready to smell a lot like garlic.


Wednesday, June 19, 2013

I'll Skewer You - Chicken Souvlaki

My favorite thing to eat at a Greek restaurant is Greek style ribs. 100%. However ribs are not my forte (at least not yet), so I make my second favorite dish - chicken souvlaki! I prefer poultry, but if you wanted to make pork or lamb, you can easily sub it out. 

The pain in the ass with souvlaki is the marinating time. I am not always amazing at meal planning and usually sort it out when I go to cook. However, since my Greek meals take a bit more than that, I usually remember/get my act together with sufficient time for the chicken to absorb the goodness. It should marinate over night, I usually do it for a few hours the day of the meal to great results though.

And by goodness I mean: extra virgin olive oil (1/4 cup), garlic (at least 3 cloves, again I go 5), oregano, and salt and pepper. Oh, and you'll need a couple chicken breasts.

Start by combining the marinate (everything but the chicken). Trim the chicken and cut into what I describe as two bite pieces. Put into the marinate as you go along, ensuring each piece is well coated. Cover and refrigerate at least 4 hours before cooking, ideally overnight.  

You can cook on a barbecue  or if you're in an apartment like me, in your oven. If cooking in the oven preheat it to 375. Soak some wood skewers in water so they don't burn. Then skewer chicken. I usually do 5-6 pieces per skewer, you can do more or less if you want to - remember, you make the rules! Cook about 10 minutes per side until cooked and not salmonella pink inside. Enjoy immediately!

And sorry for the lack of photos this post! I was a bad blogger and with my chicken hands I neglected to take photos. Raw chicken is unappetizing anyway.

Tuesday, June 18, 2013

Healthy Snack & Side - Tzatziki & Hummus

I love Greek side dishes, and specifically for this post anything I can dip bread or chips into. I hate coughing up money to buy pre-made things in the store, so I now happily make tzatziki and hummus at home! Both are super easy! When I'm making these for a Greek dinner, I usually make them the night prior so the tzatziki can marinate.

Tzatziki
You'll need: 500g Greek yogurt (I use non-fat), a cucumber, garlic, and extra virgin olive oil. First, grate one small-medium sized cucumber and using either cheesecloth or a paper towel squeeze the water out. Put rung out cucumber in a bowl with the Greek yogurt, chopped / minced / pressed garlic (3 cloves/tsps) and about 2 tbsp of olive oil. Stir well. You can enjoy right away but I find waiting at least a few hours makes it better.

Hummus
Just like my bean dip this takes moments to make and is healthy and yummy! Start with one can of chickpeas (garbanzo), empty and rinse well. Put them into your food processor or blender and add 2-4 tbsp extra virgin olive oil, lemon juice to taste (1-2 tbsp is usually good), at least 2 cloves garlic (5 is my magic number), and a bit of cumin. Puree. This is consumable immediate. Store in airtight container. 

Thursday, June 13, 2013

I Made Chicken Fried Rice!


I know, this is not a major accomplishment. I am actually very comfortable cooking asian dishes and have made many which are far more complex than fried rice, but I had never made fried rice before. So when I did last week, I felt victorious even though what I did was so disgustingly easy.

Step One: Rice
Cook rice. In whatever works for you: stove top, rice cooker, etc. As long as said rice is cooked.

Step Two: Meat
While rice cooks, cook chicken. Cut it up really tiny (think pea-sized). If you hate chicken use pork or beef or tofu. Cook in wok or frying pan with a bit of oil and garlic. I did not have garlic (gasp!) so garlic olive oil did the trick. Prepare any other vegetables you'd like to add. I put in carrots as it was all I had without a trip to the grocery store. Peas would be ideal/traditional as well. Cook those in the frying pan too.

Step Three: Put it all together
Put the cooked rice into the chicken and vegetable pan/wok. Put in soy sauce to your liking (2 tbsp is what works for me). I added some spinach because I did not have peas and felt it needed something green. Add an egg if you like. Fry while constantly stirring for a few minutes. Once done, serve immediately.

It's great beside: a Feel Good Foods spring roll and/or gyoza <- I had mine with this combo. Stir fry of you liking. By itself for good old leftover lunch. Sweet and sour chicken.

Thursday, May 23, 2013

My Husband Cooks - Gluten Free Poutine

Last week I had one of those little meltdowns. The kind where you have too many things you need to accomplish so all those life things you have to do, like cooking food, really start to get to you. In mine and my husband's history, I have been the one to cook. I met my husband because we lived in the same building, and he quickly became my best friend. I moved shortly thereafter, and to continue hanging out everyday as we did he came over after work everyday for dinner (he worked a few blocks away), which I made. 

Now years later, and married, I know he is not a cook. But in my state of exhaustion last week, I declared I needed help. He said he would cook the next day. And I was very excited  the next day when walking home I rang him to see what we were doing for dinner because we had discussed going out, that he was making dinner. This is the third time since I have known him that he has actually prepared dinner.

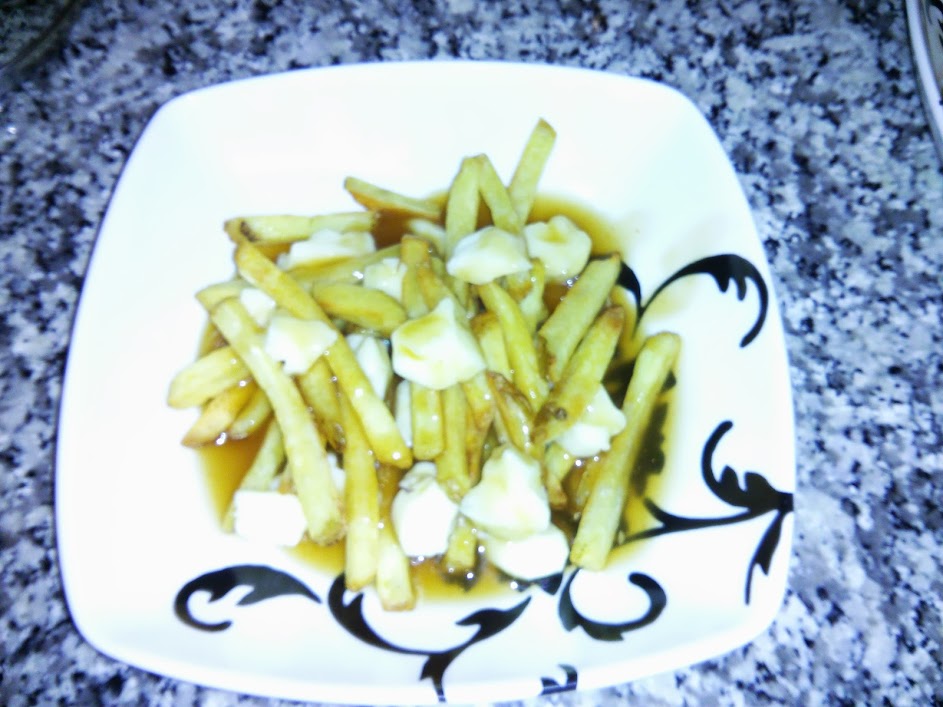
And when I got home it all made sense. His lovely sister had shipped some gluten free poutine sauce she found, and we had bought cheese curds. My man was making poutine! He was nice enough to photograph it for my blog as well. I cannot tell you about the method, but the poutine sauce (and poutine) were really good. If you live in Canada, you may be able to find this (my in-laws live in Quebec). 

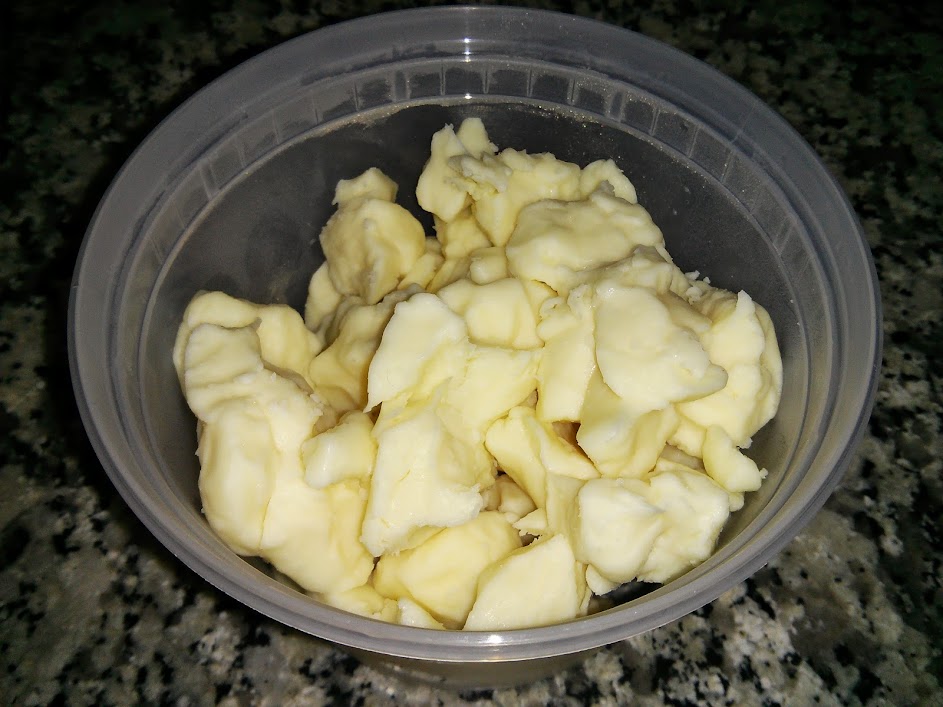
The most difficult thing to find next was the curd cheese. However, my husband discovered Saxelby Cheesemonger sells curd cheese from upstate. The curd wasn't as fresh by the time we ate it, but it certainly was adequate.

I just wanted to finish up with a shout out to my awesome husband. He made me not only one of his favorite things, but one of mine, and gave me a lovely evening after a very long day.


Saturday, May 11, 2013

Gluten Free Pancakes from a Box

It's Saturday! My favorite thing about the weekend is brunch - be in made at home or out. On a lazy Saturday a couple weeks ago I finally opened up my box of Purely Elizabeth gluten free pancake mix -  sometimes I am just too lazy to make them from scratch. 

The ready mix is just so easy to make. The box makes 2 batches. All ingredients are listed on the side of the box - just assemble in a mixing bowl and whisk together. 

While cooking
The batter will look as pictured left. Scoop 1/4 cup at a time into a preheated frying pan. I cooked two at a time. It yielded 6 pancakes, and I served with maple syrup. 

The result was pretty good. They are a bit dense as gluten free food can be, but based on the ease to make them I will certainly repurchase this mix down the road. 

The end result!


Monday, May 6, 2013

Gluten Free Chicken Nuggets


Who doesn't love a meal that includes almost entirely finger food? For meals like this, gluten free chicken fingers are the best! While you can buy them in the gluten free section of your grocery store, and while those are fine they are a bit dear. Luckily they are really easy to make yourself! All you need is:

  • Chicken
  • 2 tbsps-ish GF flour of your choice (I used white rice flour)
  • 1-2 eggs
  • 1/2 cup-ish Gluten free bread crumbs (I used Kinnikinnick)
  • Parsley to taste
  • Salt & Pepper to taste
  • A bit of paprika or any other spices you like
Preheat over to 400F. Cut the chicken into either nugget or finger shape. Then create the dipping/assembly line. The first bowl will just be just GF flour. Second will be the egg(s), which you will whisk. Finally you will have a bowl with all remaining ingredients.

For each piece of chicken, coat it will in the gluten free flour. Then dip and coat in egg. Then coat in breadcrumb mixture and place onto a baking sheet. Once all chicken nuggets/fingers/strips have been covered, put into preheat oven and cook for about 8-10 minutes per side. 

Enjoy with the sauce and sides of your choice!


Thursday, May 2, 2013

Simple French Inspired Meal

If you read my post about pastries in Paris, you already know I bought a few gluten free baguettes to bring home with me. I had big plans in mind for these, two are earmarked for enjoying with French Onion soup and the other two I wanted to use for a baguette sandwich type thing.

On my first trip to Paris, I enjoyed a lovely meal with my mom with constituted baguettes topped with garlic butter, bacon and cheese. So simple, but so amazing. And luckily easy to replicate at home.

I just grated whatever cheese was in my fridge (it happened to be Dubliner Sharp Cheddar), bacon and garlic butter. I made garlic butter by adding garlic into butter and mashing it about (I am sure that is the technical term for it anyway).  Top baguette and put in oven on broil for 2-5 minutes, basically until it is nice and toasty. Serve with soup, salad, whatever your French inspired heart desires!

This time I served with salad topped with sliced sweet peppers and a spritz of extra virgin olive oil.


What recipes have you brought home from holiday with you?

Wednesday, May 1, 2013

Gluten Free Corn Dogs

One of things that Prague had a lot of offer of was hot dogs. I am not actually a fan of hot dogs, but at times they smell so amazing that it sets off the craziest craving for me to have one. Although I know I can get a good gluten free hot dog in Long Island City, I decided to making something that I hadn't in a while - gluten free corn dogs!

They are really easy to make if you don't mind the hassle of deep frying. Start off with about eight gluten free hotdog weiners (I picked up a package of Applegate Oragnic from Trader Joe's, Nathan's is probably my favorite brand though). Dry the hotdogs with a paper towel and put into a ziploc bag with about 1-2 tbsp of rice flour and shake until they are all well coated. Then stick either a popsicle stick, or if you're stuck like I usually am, a wooden skewer stick will work as well (just cut off the extra stick at the end).

For the dough, I use I have always used this recipe which is easy and delicious:

  • 1 cup corn meal
  • 2/3 cup corn flour
  • 1/3 cup cornstarch
  • several cranks worth of Pink Himalayan Sea Salt
  • 3/4 tsp baking powder
  • 2 tbsp-ish sugar
  • 1 egg
  • 1 cup buttermilk
  • Oil for deep frying.


Mix all the dry ingredients together, then add the egg and buttermilk and whisk together. Add additional buttermilk little bits at a time of the dough is too thick. Once the dough is ready, pour it into a long glass. You will want to have enough to drip your hot dog in, but not so much that it will make the glass over flow. Drip one hot dog at a time (holding by the stick of course) and place into pre-heated oil.

It will fry on the first side for a few minutes until it is a nice golden color, then flip over and fry on the other side for a few more minutes. I use a wide and deep frying and and typically do two or three at a time. You will want to avoid overcrowding the pot of course. 

Once the are cooked/golden, take them out and place onto a plate topped with paper towel for the oil to drain into. Serve hot (warning they will be really hot) with the condiments of your choice! If you have leftovers, you can refry them to serve at a later meal while maintaining the nice crispiness of the corndog.

The result

Monday, April 15, 2013

Gluten Free Thin Crust Pizza

Sometimes one has to live by the mantra KISS - keep it simple silly! I decided I wanted to try to make thin crust pizza dough from scratch. I have never made pizza dough from scratch so I thought it would be a good challenge. Then to up the ante I also decided to make my first attempt at converting a gluten containing recipe into a gluten free one.

Based on delicious looking photos of thin crust pizza, I used this recipe from the kitchn as my inspiration to adapt. To make the base I used:


  • 3/4 cups lukewarm water
  • 1 teaspoon active-dry or instant yeast
  • 3/4 cup white rice flour
  • 1/2 cup tapioca flour
  • 3/4 cup millet flour
  • 2 tsp xantham gum
  • 1/2 teaspoons salt <- Actually I used the 1.5 tsp called for in the original, but we'll get to that.
Assemble the water and yeast and let that sit for a few minutes as you get everything else together. Then add the flour, xanthum gum and salt and mix well. Knead for a few minutes , make the dough into a ball, then cover with a warm damp towel and let rise about about 30 minutes. Preheat your oven to 500F while it rises and prepare toppings. 

Once risen, divide the dough in half and roll out on parchment paper until dough is really thin (1/4 inch or a bit less). 

Place dough with parchment paper onto baking sheet or pizza pan. Top with tomato sauce  (I used homemade), meat and vegetables. I topped with proscuitto, onion and sweet peppers.
Top with mozzarella cheese and bake in oven for 5 minutes. Swap the racks and bake another 3-5 minutes. 


The result should look like this. Slice using a pizza slicer and serve.


Now, I used the 1.5 tsp of salt - this was way too much, especially when topped with a cured meat as they tend to have quite a bit of sodium alone. It was another gone wrong moment which I presume will happen as I continue my gluten free cooking/baking adventures. I will remake this for sure, but next time with much less salt. The texture itself was nice and the dough was easy to work with and roll out. 

Have you ever made a silly mistake like adding way too much salt to something? 

Saturday, April 13, 2013

Decadent Brunch | Banana Bread French Toast


You'll do some cardio to make up for this one - but I promise it will be worth it! A couple of days ago I posted about the best banana bread ever baked, and today's post focuses on how to take said banana bread and make the an amazing brunch item, banana bread french toast.

Once you have your banana bread, you basically just make french toast. To serve 4 you'll need:

  • 1 egg
  • Cinnamon to taste
  • Milk or non-dairy milk to taste
  • A dash of salt.
  • 4 slices of banana bread
Mix those three things together. Pre-heat a frying pan over a medium-high heat. Dip both sides of each slice of banana bread into the egg mixture and place into frying pan, frying for a few minutes on each side.

Serve with maple syrup and your favorite sides, for this meal my husband made bacon and tater tots to go with. Since I first made it this has become a favorite in my apartment that we enjoy every few months.


What decadent dish do you like to serve for brunch?


Wednesday, April 10, 2013

For the Love of Tacos!

If you have been following me for a while, you may have noticed I have a major food crush on tacos. These are one of my most favorite foods and one item I never seem to tire  of. I decided to get outside of my taco seasoning comfort zone and made my own, which turned out really well. Assembling the sauce/seasoning from scratch has the benefit of controlling how much seasoning and of what you are putting in. 

To make you'll need: 
  • 1 lbs of ground turkey (or beef)
  • half an onion
  • 4 sweet peppers
  • 1/4-1/2 cup tomato sauce (I made my own)
  • Seasoning: Salt, pepper, chipotle pepper, cumin, tumeric, hot peppers, parsley, etc.
  • Gluten free soft corn tortillas
  • Carrot
  • Cheese
  • Salsa of your choice

Start by chopping up and cooking the onion and peppers over a medium-high heat. Then add the ground meat and tomato sauce and mix/chop. While it is cooking, add the seasoning according to your preferences (I encourage free styling here to make tacos to your taste).


Once the meat is browned, I usually drop the heat to medium or medium low to let it simmer a bit. At this point I start preparing a few other items that go with the tacos. 
Typically at this point I grate some cheese using the large slots on my grater, then carrot using the small slots. My preferred serving is 'build your own' so I put these into small bowls and put onto the dinner table. I also put some salsa out (this time I just opened the jar, not very fancy).

Finally, warm up the tortillas. Over medium-low heat, warm each tortilla about one minute on each side. Put the meat into a bowl, tortillas onto a plate and serve right away!

This is a fantastic easy dinner. And side note, I tried the salsa from the Brooklyn Salsa Company and it was fantastic. I had the mild one, the color was a bit off putting but the taste was fantastic. If you buy jarred salsa instead of making your own (as I do) I definitely recommend. 


When you make tacos at home do you prefer the hard shell or soft shell? What do you like to put in yours?

Share This Post